
We’re total suckers for big, bold brows. But the reality is not all of us are naturally blessed with two full and identically shaped bushes over our eyes. And if you don’t have the time (or the cash) to see a professional, it can be tempting to just cut a fringe and call it a day.
But you don’t have to book an appointment to get the full, fluffy face framers you crave. Yep that’s right, it’s time to put your PTSD from the 90s-tweezer-era behind and get ready to DIY again.
We’ve enlisted the help of Benefit’s National Brow Artist, Hannah Mutze, to deliver a foolproof guide to fuller brows, no matter what shape you have to start with.
So get ready to fake it ’til you make it.
RELATED: The best celebrity brow transformations
RELATED: The best supplements for encouraging hair growth
#1 Start with a DIY brow tint
A brow tint is the most effective way to make your brows look instantly thicker and more defined. And if you already colour your own hair at home, you’ll find the process a cinch.
“Brow tint is semi-permanent hair colour, applied to the brows for up to 10 minutes, and then removed with water”, says Hannah. “The colour defines the bulk of your brows and the fine vellous (peach fuzz) hairs in and around the brows—instantly faking a fuller looking shape and the appearance of more hairs.”
If you’re DIY’ing, Hannah’s rule of thumb is to stray no more than 2-3 shades darker than your natural brow colour. “Follow the instructions on the packet to a T, start light (you can always reapply if you would like to go darker) and apply the tint neatly on your brows. It can stain the surrounding skin if applied haphazardly.”
bh recommends: 1000 Hour Lash & Brow Dye Kit (available in eight shades).

Image: Brows with tint applied
#2 Remove any unnecessary hairs
This is where it can get tricky. Particularly because every brow shape is different (even your left and right don’t match!) so there’s no hard and fast rule about which hairs to remove.
“Every brow has natural shape—be it straight, arched or otherwise and I believe it’s important to embrace their natural tendencies as much as possible”, says Hannah. “I only remove the hairs that don’t serve any purpose to the finished shape.” Aka less is more when it comes to removal.
“Generally, I like to wax away the unnecessary finer hairs that surround the brows—above, below and in between—then tweeze closer to the shape for ultimate precision.”
Still don’t have a clue? Try the ‘quad brow ratio’ technique from our guide to shaping your brows at home OR take a photo the next time you have your brows professionally groomed and use it as a reference.
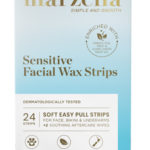
bh recommends: Marzena Facial Wax Strips & Sally Hansen’s Brows That Wow
#3 Style your brows with light layers
Immediately following a brow tint, you’ll notice you don’t need to use as much product to create fullness as before, so use a light hand and layer your products for a natural finish.
If you thought you had to choose between powder and pencil, that’s like choosing between soft and hard shell tacos—’Why not have both?”
For this brow look, Hannah used Benefit’s FoolProof Brow Powder and Precisely My Brow Pencil lightly layered together to create a natural, yet plump and full brow. And now that Benefit’s latest launch, Brow Styler, has been revealed (with it’s two-in-one pencil and powder) it’s never been easier to create a muti-dimensional look.
“I started with a super light base of powder, applied through the brows with an angle brush”, she says. “I used Shade 1 to keep the base light and neutral in undertone. I like my base to be lighter than the hairs so you can still see the natural texture of the brows.”
Following with the pencil, Hannah says she utilised the mirco fine tip to then define edges and create hair-like strokes. “I flicked some hair-like strokes through the very front of the brows where they grow vertically to make this area look fuller, but still soft and natural.”

Image: Brows after styling
#4 Set your brows
Once you’re happy with the shape and fullness of your brows, it’s time to lock it all in.
“I finish every brow with 24Hr Brow Setter. It’s a clear brow gel with super strong holding powers”, says Hannah. “To create this groomed, feathery finish I used the long bristles to brush the brow hairs up and slightly out towards the temple. The gel locks the hairs into place, and also works to secure any other products applied.”
Once applied, leave the gel for about 30 seconds and under Hannah’s strict instruction, DO NOT TOUCH. One layer is all you need for brows that stay all day.

Image: Brows before and after
*This article has been updated since its original publication date
What’s your best tip for faking fuller brows?


my brows have not been done for ages, im letting them grow, although i use a brow fibre gel and conceal around them to the shape i want, and i love the look
Great transformation and handy tips