There are many reasons to learn how to give yourself a DIY manicure. Whether you’re saving money or simply can’t find the time to go to the salon, being able to give yourself a salon quality manicure at home is a great skill to have. But mastering the DIY manicure isn’t easy. In fact, it can be messy.
For a fuss-free, flawless manicure from the comfort of your couch, we’re sharing our best at home manicure tips ever. Watch the video above to see the five steps you should follow for a salon quality manicure at home.
Can’t watch the video? Read the tips below to get started.
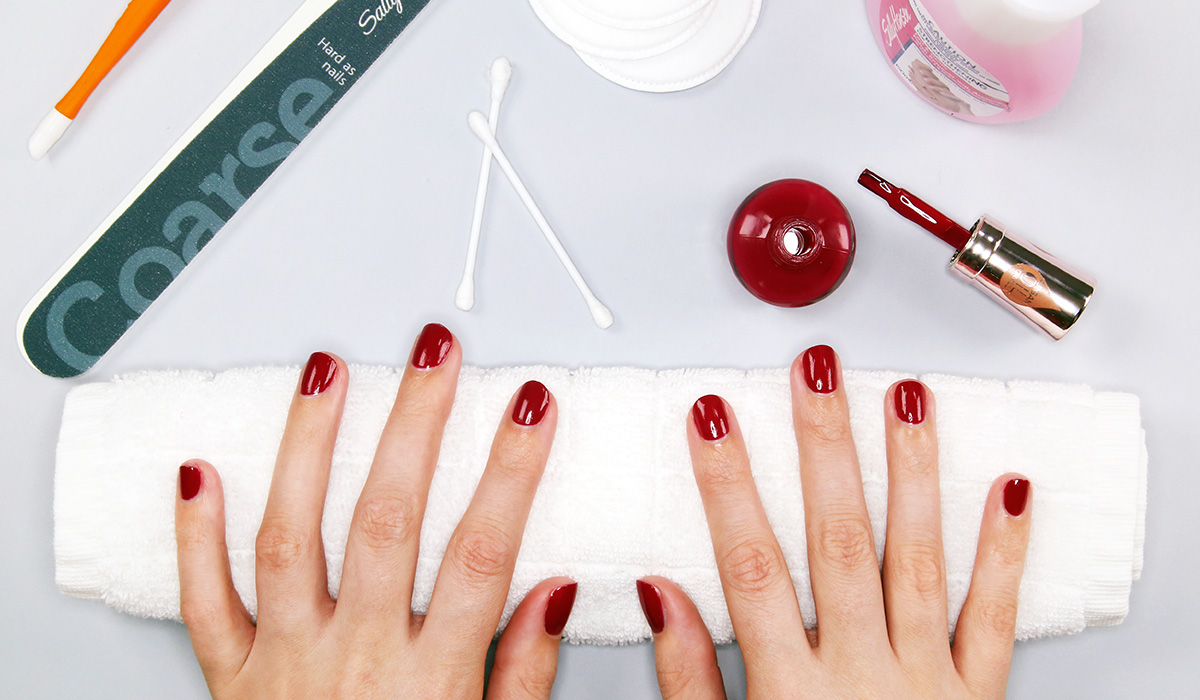
Step #1: Get the shape
First things first, you need to get the shape right. Make sure your nails are dry to avoid splitting. Using a nail file, slowly file the nail in one direction, working towards the middle of the nail. For an even result, try to mirror the shape of your cuticle.
Step #2: Prep your nails
Now that you’ve got your shape, it’s time to prepare your nails. Start by applying a hydrating hand cream to the back of your hands and then massaging it in. The skin on the back of your hands is thinner and gets dry easily so use most of the cream there. Next, use a cuticle stick to gently push your cuticles back.
Step #3: Add colour
Before you pick a polish, it’s best to remove all traces of lotion from your nails using a cotton tip and nail polish remover. We’re using the shade Ohm My Magenta from the Sally Hansen Color Therapy Nail Polish range. There are 14 shades in the range, so you’re sure to find one that suits you. From pinky nudes and subtle neutrals to bright pops of colour and bold statement shades, there’s a shade for everyone. The formula contains patented argan oil for intensive nourishment and instant moisture. So you can skip the base coat and allow the polish to care for your nails while you wear it.
After you’ve chosen your polish, avoid shaking the bottle and roll it between your palms instead to avoid bubbles. When you’re ready to paint, always start on your dominant hand for more control and to avoid smudges. Use the 3 stroke technique to apply your polish – start in the centre of the nail, pushing the colour towards the cuticle and pulling back in a single stroke. Paint a stroke on each side of the nail. Then paint a second coat and wait for the polish to dry. Clean up any mistakes with a cotton tip and nail polish remover.
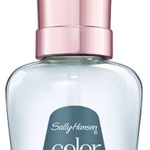
Step #4: Seal in colour
For a long-lasting colour, you need to use a top coat. The Sally Hansen Color Therapy Top Coat will give you 10 days of wear, without any touchups.
Step #5: Show your nails some extra love
For healthy, great-looking nails, treat yourself to the Sally Hansen Color Therapy Cuticle & Nail Oil. Massage the oil into your nails and cuticles daily to give them some extra TLC. Now go show off your flawless new mani!
Have you tried giving yourself a DIY at home manicure? What do you think of the Sally Hansen Color Therapy range?


I used to do this; could give it another go now