I’m all for a romantic pink manicure. Or nails that are a popping shade of yellow. But there’s just something about a dark nail hue that’s just edgy and sexy all at the same time. So if you’re looking to channel your inner rock chick and sport a nail look that’s the perfect accessory to a leather jacket, a striking red lip and voluminous hair, then you’ll want to follow this simple how-to, provided by Sally Hansen nail expert Alison Bowhill-Hayes.
Before you do anything, make sure you have your tools, treatments, and polish set up. You’ll need:– Cotton pads (try: Mavala Switzerland Cotton Pads)
– Nail polish remover (try: Designer Brands Twist & Go Instant Nail Polish Remover)
– An emery board (try: Cutex Emery Boards)
– Nail clippers (try: Biosculpture Pink Glitter Nail Clipper)
– A cuticle remover (try: Sally Hansen Push ‘n Trim)
– A cuticle pusher
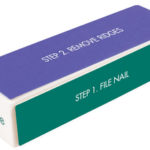
– A nail buffer (try: Manicare 4 Way Buffer)
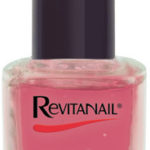
– A base coat (try: Revitanail Base Coat)
– Your nail colour (use a black, plum, or wine-coloured shade. Tr

– A top coat (try: Chi Chi Quick Dry Top Coat)
Step #1: shape your nails
Remove all traces of old nail colour or treatment product. If your nails are too long, trim them to even the lengths with clippers (if your nails are quite weak, try using scissors). It’s a great idea to keep your nails quite short, as darker colours suit short nails best.
File the edges smooth with a nail file or emery board and finish by filing underneath the nail to neaten the edge. Remove ridges and smooth the nail by buffing the surface gently with your nail buffer. This final step of prep is crucial, as it will make your mani last longer and give it a professional look.
TIP: For salon-quality nails, try the “Squoval” shape (square + oval). Your nail edges should be straight with slightly rounded corners.
Step #2: treat your nails
If you have over-grown cuticles, soften them in warm water for a few minutes, then push them back. You can gently nip away hang nails, however a golden rule is to never cut cuticles unless you have to, as they can grow back thicker. The skin here is very fragile and should be intact and well hydrated if you want good healthy strong nails.
Step #3: paint your nails
If you have used a cuticle cream or oil, remove any residue from your nails with nail polish remover. Now your nails are ready to apply a base coat.
TIP: If you have problem nails (for example, weak nails or nails that are ridged or won’t grow), use a base coat that will help improve the quality of your nails.
Apply two coats of your dark nail colour. One coat is not enough and three coats is too many. Finish with a topcoat to seal the colour, add brilliant shine and help the nail colour last.